
Thursday, 21 October 2021
Tuesday, 19 April 2016
Papercrafting meeting Crocheting and Blocking Tutorial.
Hi Guys'
It's been a long time since I posted on my blog and for all you visually aware folk, as you can see, there's been a little name change, or addition to the old name.
When I go searching for the old name 'joolspapercrafts', it comes up saying the blog has been removed, no clue what I did there. Anyway, I've no idea if all my lovely followers will see my name change blog. I hope you still can.
I've diversified rather a lot since we last spoke and have been concentrating most of my energy on 'Crochet Amigurumi'. I think the 'Crochet Cuties' bit might have been a bit of a give away. I also have an Etsy shop now and I'd be thrilled for you to pop across and have a look and let me know what you think. Here's the link-
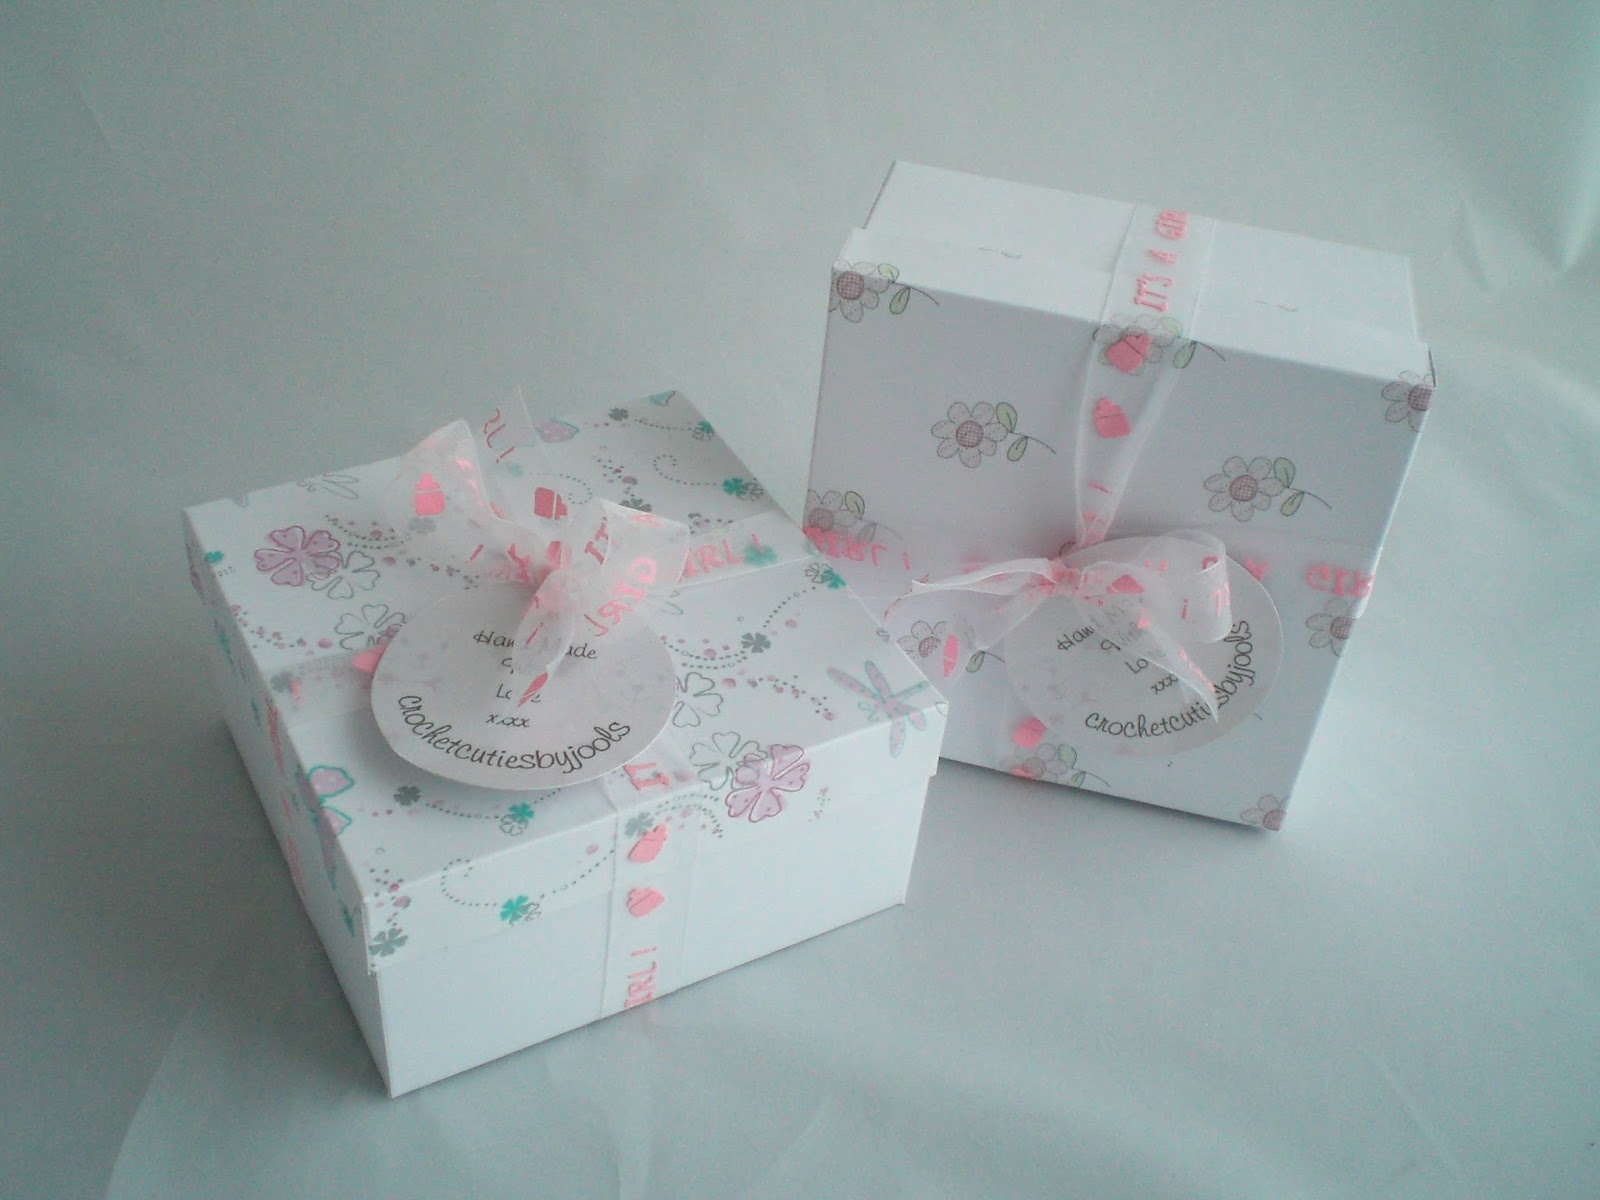
Anyway, down to today's post and what it's about. This is the finished product and as you can see, I'm still loving my paper crafting.

They're baby shower gifts for my sister, who I might add is an excellent knitter, but says she thinks crochet is prettier. Hmmm. She saw some little shoes and mop cap I was making for my shop and asked me to make two sets for the baby showers she'd been invited to.
Most of my visitors are crafters and we are all aware that it doesn't matter how much work and effort we put into a project, any project, if we don't finish it properly, it won't look polished. In the case of crocheting, weaving in the ends and BLOCKING is very important, to achieve your finished look.
The equipment you need is quite straightforward. I used foam play mats from a bargain shop and at first, glass headed pins. I later found some great double pronged pins from clover, which are much easier on the fingers. These are some of the cheapest I have found. They're a bit pricey, but so worth it. I kept pulling the heads off the glass pins and getting them stuck in the foam.

Geometrical shapes are quite easy to block out, it's the more complicated shapes that are more challenging. Most of my things are made with Acrylic yarn and this demo is for that yarn only. Other fibres have to be treated differently. You tube is a good place to look if you're in doubt.
The garment has to be damp in order to set the stitches. There are two ways to do this. You can pin the garment to the mat dry, then spray with water, or you can do it my way. I like all my baby clothes to smell nice and fresh, so I hand soak in warm water and some fabric softener then spin. Next job is to pin out. This is where you must stretch the work slightly, to get it into shape. Not too much. I use plenty of pins, I don't want my work to have dips in between the pins.

The shapes are still quite simple and therefore straightforward to pin.

This one is an example as to why it's better to use lots of pins. If I left bigger gaps between the pins, the work wouldn't be straight.

So, how do we handle the more complicated shapes. Well there are lots of ingenious ways that I've managed to come up with. Baby hats. Unless you can borrow a baby for a few hours and they don't object to having a damp hat on, we have to find another way. Da da.....

No, they're not mushrooms, as my sister suggested. They are the head and body of some Amigurumi Rabbits, who are waiting for their limbs. The heads just fit. :)
So..... now down to what's in the boxes.

The mop caps were no problem, they're just circles. The bootees were a bit more problematic.

They were easy enough to pin down, using the sole, but the body of the boot was collapsing.

So I stuffed them with polyester stuffing. Simples. ;) Well I do have quite a lot.

Now when your pinning, don't forget the little details. If you don't pin down flower petals and such like, they'll just curl up.
Leave them to air dry. It's been lovely and sunny today, so I sat them where the sun was shining in the window. Add some ribbon to finish and there you have them, pretty baby shower gifts.


Soooooooo cute.
These sets aren't in my shop at the moment, but watch this space.
Thank you for coming by and taking the time to read my post, hope you found it useful and do join me again for another tutorial.
Much love,

It's been a long time since I posted on my blog and for all you visually aware folk, as you can see, there's been a little name change, or addition to the old name.
When I go searching for the old name 'joolspapercrafts', it comes up saying the blog has been removed, no clue what I did there. Anyway, I've no idea if all my lovely followers will see my name change blog. I hope you still can.
I've diversified rather a lot since we last spoke and have been concentrating most of my energy on 'Crochet Amigurumi'. I think the 'Crochet Cuties' bit might have been a bit of a give away. I also have an Etsy shop now and I'd be thrilled for you to pop across and have a look and let me know what you think. Here's the link-
Anyway, down to today's post and what it's about. This is the finished product and as you can see, I'm still loving my paper crafting.
They're baby shower gifts for my sister, who I might add is an excellent knitter, but says she thinks crochet is prettier. Hmmm. She saw some little shoes and mop cap I was making for my shop and asked me to make two sets for the baby showers she'd been invited to.
Most of my visitors are crafters and we are all aware that it doesn't matter how much work and effort we put into a project, any project, if we don't finish it properly, it won't look polished. In the case of crocheting, weaving in the ends and BLOCKING is very important, to achieve your finished look.
The equipment you need is quite straightforward. I used foam play mats from a bargain shop and at first, glass headed pins. I later found some great double pronged pins from clover, which are much easier on the fingers. These are some of the cheapest I have found. They're a bit pricey, but so worth it. I kept pulling the heads off the glass pins and getting them stuck in the foam.

Geometrical shapes are quite easy to block out, it's the more complicated shapes that are more challenging. Most of my things are made with Acrylic yarn and this demo is for that yarn only. Other fibres have to be treated differently. You tube is a good place to look if you're in doubt.
The garment has to be damp in order to set the stitches. There are two ways to do this. You can pin the garment to the mat dry, then spray with water, or you can do it my way. I like all my baby clothes to smell nice and fresh, so I hand soak in warm water and some fabric softener then spin. Next job is to pin out. This is where you must stretch the work slightly, to get it into shape. Not too much. I use plenty of pins, I don't want my work to have dips in between the pins.

The shapes are still quite simple and therefore straightforward to pin.

This one is an example as to why it's better to use lots of pins. If I left bigger gaps between the pins, the work wouldn't be straight.

So, how do we handle the more complicated shapes. Well there are lots of ingenious ways that I've managed to come up with. Baby hats. Unless you can borrow a baby for a few hours and they don't object to having a damp hat on, we have to find another way. Da da.....

No, they're not mushrooms, as my sister suggested. They are the head and body of some Amigurumi Rabbits, who are waiting for their limbs. The heads just fit. :)
So..... now down to what's in the boxes.

The mop caps were no problem, they're just circles. The bootees were a bit more problematic.

They were easy enough to pin down, using the sole, but the body of the boot was collapsing.

So I stuffed them with polyester stuffing. Simples. ;) Well I do have quite a lot.

Now when your pinning, don't forget the little details. If you don't pin down flower petals and such like, they'll just curl up.
Leave them to air dry. It's been lovely and sunny today, so I sat them where the sun was shining in the window. Add some ribbon to finish and there you have them, pretty baby shower gifts.


Soooooooo cute.
These sets aren't in my shop at the moment, but watch this space.
Thank you for coming by and taking the time to read my post, hope you found it useful and do join me again for another tutorial.
Much love,
xxxx
Saturday, 28 June 2014
New Baby Girl Rocker Card with Fizzy Moon.
Hi Everyone,
How is everyone? Thought I'd just do a quick post. I made this card, us for my neighbour Linda's daughter Charlene, who had a little girl on the11th June. Congratulations to you all. Can you guess which digikits I used?
.jpg)
Did you guess? I used the Spellbinders Grand Big Scalloped circle dies to cut the shapes out of contrasting backing papers from the FM New Baby kit. I always use super smooth card for my images and when I make a rocker card I also print the backing papers on the same card, which is 220gsm, to give extra strength.

The largest die is used twice, once in plain white 300gsm card, which is scored in half and folded, to form the rocker base, then again in the patterned paper. The next layer is the third largest, which is then mounted with double sided foam. All the edges were distressed with Tim Holtz spun sugar and faux stitching was added to both layers using a pale pink fine line pen.

There are several images to choose from in the kit, but I thought this one was so cute, especially as Charlene is a new Mum. I can remember when I was a new Mum (just) my baby was never far away from me. I used the crop tool to make some decoupage layers and mounted them with foam pads to add some dimension.

To add the baby's name I used the bunting from FM Playtime. This bunting can be used for any length sentiment, just crop a couple and join them. The letters are also in the digikit. Brooke Anne, what a beautiful name, they were also mounted with foam for dimension. The flowers are from my stash, you can see that tale here. I think I have enough to last my lifetime. I added some glamour dust to the centre of the flowers to add a bit of sparkle.

Some card candy, new baby ribbon in pink and a matching box and the card is done. Charlene and Linda loved it, looks like I may have some new customers, they had no idea I made cards.
I am entering this card into the following challenges:-
Thank you for coming by, do come again.
Love

xx
How is everyone? Thought I'd just do a quick post. I made this card, us for my neighbour Linda's daughter Charlene, who had a little girl on the11th June. Congratulations to you all. Can you guess which digikits I used?
Did you guess? I used the Spellbinders Grand Big Scalloped circle dies to cut the shapes out of contrasting backing papers from the FM New Baby kit. I always use super smooth card for my images and when I make a rocker card I also print the backing papers on the same card, which is 220gsm, to give extra strength.
The largest die is used twice, once in plain white 300gsm card, which is scored in half and folded, to form the rocker base, then again in the patterned paper. The next layer is the third largest, which is then mounted with double sided foam. All the edges were distressed with Tim Holtz spun sugar and faux stitching was added to both layers using a pale pink fine line pen.
There are several images to choose from in the kit, but I thought this one was so cute, especially as Charlene is a new Mum. I can remember when I was a new Mum (just) my baby was never far away from me. I used the crop tool to make some decoupage layers and mounted them with foam pads to add some dimension.
To add the baby's name I used the bunting from FM Playtime. This bunting can be used for any length sentiment, just crop a couple and join them. The letters are also in the digikit. Brooke Anne, what a beautiful name, they were also mounted with foam for dimension. The flowers are from my stash, you can see that tale here. I think I have enough to last my lifetime. I added some glamour dust to the centre of the flowers to add a bit of sparkle.
Some card candy, new baby ribbon in pink and a matching box and the card is done. Charlene and Linda loved it, looks like I may have some new customers, they had no idea I made cards.
I am entering this card into the following challenges:-
Thank you for coming by, do come again.
Love
xx
Subscribe to:
Posts (Atom)