Showing posts with label MCS. Show all posts

Saturday, 26 April 2014

Happy 8th Birthday for a Girl.

Hi Guys',

Hope you're all well and had a lovely Easter. Thought I'd post a quick card in between washing and drying, yuk. Much rather be crafting.

This card is the other half to the twins' cards I did for a friend at work. The first male one was posted a few months ago, so I thought it was time to post this female one.


It's a pretty pastel coloured MCS picture window card, using an image from the 'Countryside Garden' cd. I really enjoy making these 3D cards and they're so effective. I've adapted the style for many occasions now.  


I printed extra butterflies and decoupaged them inside the card, to add extra dimension and also resized them, to use as embellishments on the front of the card. I love the way you the windows open to reveal the image, by pulling on the side flaps.


The no8 was cut on my cricut, using pink coredinations card.


A verse and a place to write a greeting was added to the back of the card.


And of course, no card is complete without a pretty box to match. I was told the little girl loved it.


I am entering this card into the following challenges :-


Thank you for visiting my blog, do come again.


Love,

xx

Sunday, 9 September 2012

Auntie's 90th birthday easel book card.

Good afternoon everyone,

What another beautiful day, hope it lasts, I'm going away next Monday. Anyway, back to today's card.

I am very recently back in touch with a lady I used to work with, eons ago. The wonders and joy of facebook, love it. Well Rose started following my blog and asked if I could make a card for her Auntie's 90th birthday. Well I think 90years warrants a very special card, so I decided to make her an easel book card. Hope she likes it.


I was told her Auntie likes flowers and wee birdies. This image is an MCS one, from the 'Tattered Lace' collection. The template for the book pages and the backing paper are all clipartfairy.  I imported the book pages into MCS, varied the sizes, then added the image, a verse and the number 90 to the front page.


The sentiment/stopper, is again the front page, with the wording in the same font as the verse. I added gross grain ribbon in yellow, before assembling it.


The flower is made using the the same backing paper and the spellbinder spiral blossom one, with a floral flourish in white, distressed with Tim Holtz shabby shutters. All the layers and the flower were enhanced with glamour dust and some pearl embellishments were added to finish.


I love this design of card, I think it can be adapted for any occasion, I do hope Rose likes it.


I am entering this card into the following challenges:-


Digital Tuesday - Shaped cards.
Fab n Funky - Colours of autumn.
Polka Doodles - Whats the word bird?
Crafts 4 Eternity Recipe Challenge - Vintage toy colour inspiration.
Allsorts Challenge Blog - Layers.
ABC Challenges - W for wishes.


Thanks for coming by, hope to you you again soon.

Jools.  xxx


Wednesday, 5 September 2012

Saying 'Happy Birthday Mum', with flowers.

Hi Guys',

I don't know about anyone else, but September is definately the birthday season for me. I have seven family birthdays.

So here's the first one. It's for my lovely Mum. She's 84 this year. Wow.


Her favourite colour is blue, but I sent her a blue one last year, so seeing as I am still going through my purple and lilac phase, I thought I'd go with that. She loves flowers, so I chose an MCS digi stamp from 'Fanciful Florals', and used promarkers to colour it. The backing papers are Papermania, from their rich purple collection. The spellbinder grand large scallop mat and the grommet 'MUM' tag, are both cut in white 240gsm linen card.


Some purple ribbon from my stash, a couple of pearl hatpins and some pearl embellishments and it's done. Hope you like it.


I am entering this card into the following challenges :-


Pan Pastels UK Challenge - All about stripes.
Papertake Weekly Challenge - Anything goes.
Inky Impressions Challenge - Anything goes.
ABC Challenges - W for wishes.
Heck of a Challenge - Anything goes.


Thank you so much for taking the time to come by and look at my blog.

Jools.  xxx

Thursday, 30 August 2012

More Wedding Cards for the Happy Couple, with Tatty Ted and MCS.


Hi Guys,

Bit rainy today, so what better excuse. Mind you, don't really need one, I could play all day in my craft room, how about you? Got loads of family cards to make for September ( does something happen in December? ) so thought I'd post these last three wedding cards before I get cracking.

This first one is a picture window card. This design has been quite popular with my customers, and at the craft fairs. They can be adapted and personalised for any occasion. It's a My Craft Studio design from the 'Crystal Sparkles' collection, I just change the colours to suit and the image is from the 'Enchanted Romance' collection.


The inside was personalised with the details of the wedding and ribbon added to emulate the brides veil. I love the 3d effect of this card, the way the windows open to reveal the bride and groom.


To finish, I added a pearl heart embellishment from my stash, and a wordart sentiment and of course, I had to do a box to match :) 


This second one is a 'Tatty Ted' easel card from my Docrafts 'Especially for You' cd. I love this image, it's different and sweet. It's not too difficult to cut out and decoupage either, there are no small fiddly bits.


It's a large image, so I used an 8x8 card blank. The easel shape and floral flourishes were cut from silver satin mirri board using spellbinders labels one and floral flourishes. The backing paper is from Clipartfairy, which I also used to make  the spellbinders spiral blossom flowers. A spellbinders grommet tag sentiment, some white ribbon and a silver coloured cross and the card is finished.


Finally, this last card was chosen by the brides Mum. If you'd like details you can find it here. The only modification she stipulated was that she wanted teal pearls, to match the brides colours, and a see through panel in the box. I also added the bride and grooms names and the date of the wedding, instead of the wedding day tag on the original.


I put killer verses in all the cards, spent a long time choosing just the right ones. My sister said they had the desired effect, not a dry eye to be seen.

Hope you liked them all and hope that they may inspire you in some way, especially if you're lucky enough to be allowed creative licence on such a special occasion, as I was.


I am entering these cards into the following challenges :-


Simon Says Stamp Challenge - Anything goes.
Allsorts Challenge Blog - It's a Gift.
A Gem of a Challenge - Animals or Teddies.
Gems, Reddy, Teddy, Go - Anything goes.


Thank you for visiting my blog. Hope you have as much pleasure looking as I do writing it.


Hugs,

Jools.  xxx

Monday, 27 August 2012

Wedding Cards for that Special Day.


Hi blogger buddies,

Hope you're all well. Been very busy making wedding cards ( five in all ) for the wedding which I made not only the invitations for ( here ), but also six drawer cards, for the bridesmaids gifts ( here ), so all in all, I've had a wonderful time creating for this special day.

I think the biggest challenge was to make all the cards very different, while keeping to the briefs, here are the first two.

I think this first card is my favourite, it was ordered by the grooms mum. She wanted her grandchildren to be able to give their mummy and daddy a special card on their special day. I think it has a lovely fairytale feel to it.


The whole card, which is 8x8, was designed using the MCS graphics program. The images are all from the 'Papercraft Library' collection in the finest filigree section. The bride and groom were placed in the bird cage, which was cut out and glittered, before being shaped and mounted with foam pads to give dimension. I also added a Mummy and Daddy scroll in teal, to the bottom of the cage. The backing papers are from my Docrafts 'Especially for You' cd.


The butterflies are of some significance. These were an important part of the brief. There is one for each of the children, the teal one for their son and the two orange ones for their daughters. The colours were also in the brides bouquet. To finish, I added a key charm and some white ribbon.


My second card was for  the brides brother and sister to give to the happy couple. The brief here was to design a young card, so I decided to use my 'Clipartfairy' wedding car design set.


The car was printed twice and then decoupaged for dimension. I added red glitter to enhance the break lights and all the other red detail and glamour dust around the main design.


White and silver ribbon and some pearls were added to finish.


I am entering these cards into the following challenges :-

My Mums Craft Shop Challenge - Wedding or Anniversary.


Hope you liked them and thank you for popping by.

Jools.  xxxx


Sunday, 19 August 2012

With Love From Saturated Canary's Ava.

Good afternoon bloggers,

Well, isn't the weather glorious. I will not mention, at all, that it's incredibly hot, because that would sound like I was moaning, and I wouldn't dare.

I've been trying all weekend to post this card, for some reason blogger wouldn't upload my pictures. Anyway, went onto blogger help and it suggested I change my browser provider. Changed to Google Chrome and VOILA, I was not only able to upload pickies, I can now upload multiple ones. Go figure. Just have to find all my favourites now!!!!

So, today's card features a Saturated Canary digi stamp called 'Ava'. 


I used promarkers to colour her, in pastel pinks and beiges. I do love Saturated Canary digi's, the characters are all wide eyed and modern. I used my spellbinders grand labels eleven to make this card. It's a sort of a rocker with a flat bottom. The card is 240gsm linen in cream and the backing paper is from my Docraft 'Woodland Folk' cd.


I added plenty of pretty flowers and flourishes to emphasise the pretty topper. The flowers are MCS in various colours with glamour dust to the centres and the flourishes are made with my spellbinders floral flourishes die, distressed with Tim Holtz spun sugar.


To embellish I added some white gross grain ribbon from my stash and a metal flower from GSC imports. Finally, I added a with love tag from cardart, secured with a butterfly brad.


 I'm entering this card into the following challenges:-

Passion for Promarkers - Shaped cards.
Papertake weekly challenge - Spots and stripes.
Inky Impressions Challenge - Pearls &/or bling.
Moving Along With The Times - Anything but square.
Craft Punked - Flower power.
Polka Doodles - Tags.
Allsorts Challenge Blog - Heavy metal.


Thank you for coming by and visiting my blog. Later's.......


Jools.   xxxx


Saturday, 11 August 2012

Denny the Dinosaur says Happy Birthday.


Hi Guys,

Been over a week since I posted on here, had a few wedding cards to make, so they've been keeping me plenty busy. Trouble is, I can't post them until after the 18th, so I thought I'd have a break today and do something a bit different.

So here's today's card, it's a birthday card featuring Denny the Dinosaur. Isn't he cute. It's a freeby digi stamp by Pink Gem Designs ( I've had to edit this post because I put the wrong company, sorry Janet ) and I'd not used it yet, so thought I'd have a go.


I used promarkers to colour the image, in my favourite colour I might add, then it was matted onto lilac co-ordinations card, using my spellbinders grand big scalloped circles die. The backing papers are docrafts, from their especially for you cd. Flowers are MCS, printed in various colours, with a glittered centre.  Spellbinders floral flourishes have been added in lilac and purple and two parchment butterflies, made using the pergamano butterfly grid. The gems and ribbon were taken from my stash. Finally, the celebrate tag is from cardart.


Hope you like it, I certainly enjoyed making it, a nice refreshing change.

I'm entering this card into the following challenges:-


Allsorts Challenge Blog - Going round in circles.
Digital Tuesday - Recipe. (1image,2papers,3flowers,4gems)
Papertake Weekly Challenge - Anything goes.
Fab N Funky Challenge - Pearls or rhinestones.
Simon Says Stamp Challenge - Bingo. (diecut/free/glitter)
Inky Impressions - Ribbon.
Forever Friends - Something new.
Joanna Sheen Challenge - Something new.


Thanks for visiting my blog and do come by again.

Jools.  xxxx


Sunday, 27 May 2012

Birthday Card with Tilda Sitting on a Pocket.


Hi guys',

What a beautie of a day, I do hope it lasts. I'm starting my motor home search next week and would love for the weather to hold. It's my retirement present to myself :)
Today's card has been done in between reading a really good book in the garden and crafting.  I've finished the book now, so no more distractions

I've used one of my new Tilda images. I treated myself to a couple or three the other day and I've been colouring for the past couple of evenings, got loads now, ready for cards.  This one is Tilda sitting. Hasn't she grown up quickly, doesn't seem two minutes since she was a baby. I made this card with a couple of challenges in mind, both asked for a pocket, so here it is, with Tilda sitting on it. Isn't she cute, with her cherry wellies? The challenges are listed at the end of the post.


The pocket is made from a piece of purple Papermania card and then embellished with some lace, faux glitter stitching and a button with twine. Tilda is coloured with promarkers and mounted on foam. The button background paper is from Clipartfairy and the spotty background is again, Papermania, from their rich purple collection. The border pattern is the wild flowers around the page punch from Martha Stewart.  


All the flowers are hand made using MCS, they're just not going down!( see here,)and the floral flourishes are spellbinder dies. I used holographic silver and purple for these.


To finish I added cream ribbon from my stash, a Hunkidory sentiment and some card candy.

Hope you like it and thank you for taking the time to visit my blog.  


I am entering this card into the following challenges :-


Fab 'N' Funky Challenge - New Beginning ( new stamp)
I Love Promarkers - Use Diecuts.
ABC Challenge - P for Pocket.
Midweek Magnolia Challenge - Romantic and chic.
Allsorts Challenge Blog - Happy Birthday to someone special.
Oo La La Creations - Make it girly.


Bye......

Jools.  xxx


Friday, 11 May 2012

Boy's and their Motorbikes 50th Birthday easel.


Hello everyone,

What a lovely sunny day, can we hope?  Today's card is number three of the four BOY cards I have to make this month. I don't mind this one though. It's plain, simple and to the point. It's for my bike mad Brother's 50th birthday. Eeek, I can't believe my kid brother is half a century old.


I used the  3rd anniversary CD  from MCS  to make this card. There are a couple of sections in this set that are ideal for men, this one's called 'The Finishing Line'. I'ts a standard easel card made from an A5 card blank. The backing paper is on the cd, but to make it more personal I tiled '50' all over it. The topper was mat and layered first onto deep blue mirri board, then onto black pearl card, to give added strength. The lettering was cut using my cricut, in the same blue mirri board and the sentiment was again mounted on blue mirri.


I wonder if he'll notice that even the bike number is '50'. That's quite straight forward to do in the MCS graphics program. A bit of black card candy and that's the front finished.


The verse is on the back of the card. I couldn't decide whether to put a slushy verse or a humerous verse. I went for humerous in the end. Hope he see's the funny side.


I am entering this card into the following challenge :-


Cards For Men - Kicking back
Allsorts Challenge Blog - Card for a man or boy.


Hope you like it, thanks for coming and see you soon.

Jools. xxx


Monday, 7 May 2012

Football birthday cards for big boy's.

Hi everyone,

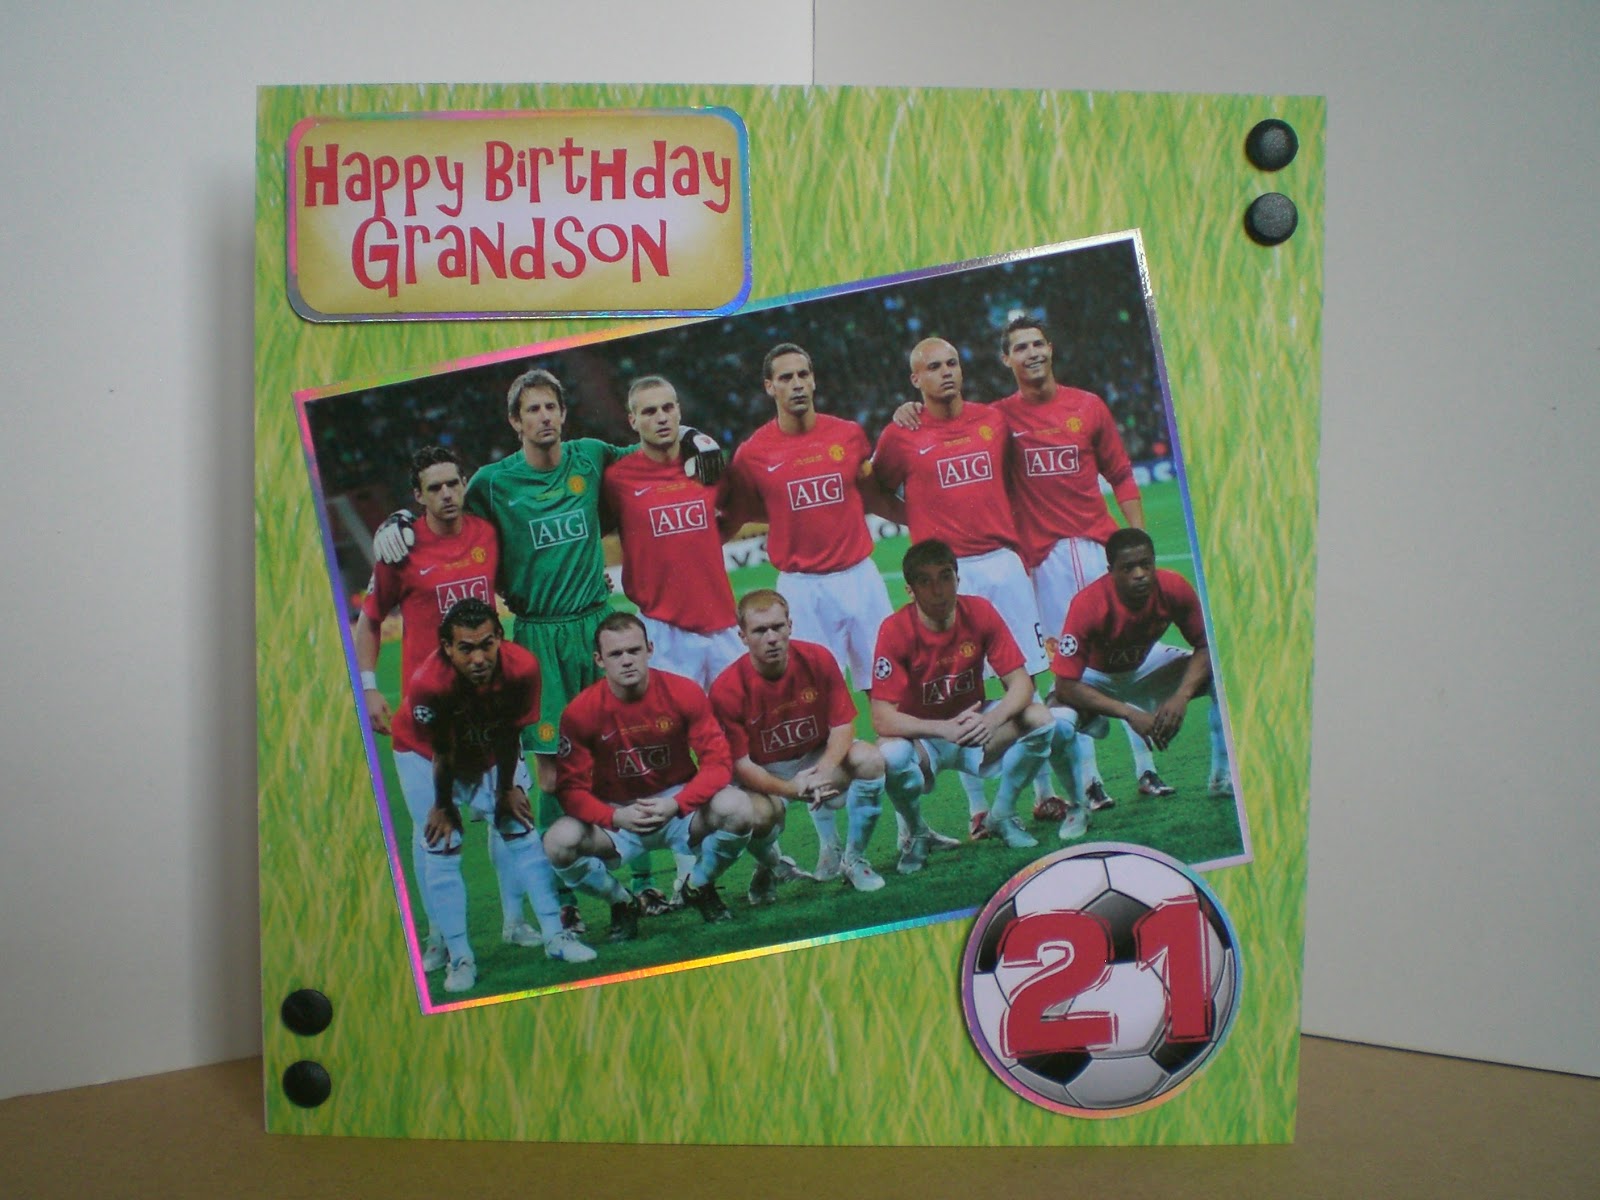
Well, that's two down and two to go. Don't you just love BOY cards. It's either football, golf, motorbikes or cars . Such variety. In this instance it happens to be football, or to be more precise, Manchester Utd. It's my great nephew's 21st birthday, my sister's Grandson, so they were the two cards I had to make. I'm quite happy with the results ( but can't wait to get back to my glitter and glitz)


Here's the card I made for me to send. I decided to use the Manchester United colours for this one. The backing paper is from MCS and I just tiled 'Happy Birthday' all over it. I printed the same backing paper on 220gsm supersmooth card and made the rosette. The centre is a clipart football mounted onto silver mirricard and the numbers were cut out on my cricut, again in mirricard. A bit of black card candy (had to get some in somewhere) some satin ribbon and a sentiment from cardart to finish.

My sister wanted me to use an actual picture in this next one, with Ricky as part of the team. I did this last year for my Grandson and it was quite effective.


I downloaded a picture of  ManU and imported it into Craftartist to work some magic. I was a bit limited with pictures of Ricky, so I settled for this one. He's sticking his tongue out showing off his tongue stud. Him to a tee. There he is, next to Scholes. That's worrying, I know the names?!? I mat and layered onto some holographic card and placed it at a jaunty angle. The background is from the Docraft Woodlands folk and friends. I thought it was quite apt to have grass. Bit of black card candy again, it finishes it off. That's my excuse and I'm sticking to it. Hope he notices himself.


My sis just turned up, she loves it and says Ricky will too. Phew, that's a relief.

Thanks for coming by, see you soon.

Jools.  xxx


Sunday, 15 April 2012

Springy bunny birthday easel card.

Good morning fellow bloggers,

I think it is JUST morning. Was up bright and early to do this post, but I felt I ought to do something about my craft room, it was bleeding all over the house!!!!!! Anyway, problem rectified, bleeding controlled and now for my favourite thing, crafting.

Today's is in keeping with the season, which, I have to keep reminding myself, is SPRING. How many people had hailstones yesterday, unbelievable. I digress.


The easel card is back. Haven't done one for a few posts and it is one of my favourite shapes. I think the rocker card may have knocked it off the top spot. The digital design is a clipartfairy creation, from the wee bunnies cupcake collection. I love the colours, definitely springy :) All the images are finished to a high quality and can be imported into most graphics programmes. I used MCS Professional for this one.


The backing paper for this design was a freebie, again from clipartfairy, can you tell I'm a fan. The shapes were all cut out and  glittered around the edges before being layered using mounting foam. They're not spellbinder shapes, they've been layered in a graphics program using puches. If you notice, the outer edges are different to the centre. These came ready done, but I've now learnt how to do it in CraftArtist Pro.

The image was also mounted with foam, after first curving it to add some dimension. I didn't bother decoupaging this one, I didn't think it needed it. It was finished with some card candy, a bow and some of my flowers,  I don't seem to be making much of a hole in them,(see my very first post) The ribbon is wired. I wasn't sure about using wired ribbon at first, but I quite like it now. The bow keeps its shape. It doesn't suit all cards though.


I always like to make a matching box for my big cards.  Would hate for all the embellies to get squished and flattened. I had to do plain white ones before I got my A3 printer, but now I can do patterned ones to match the card.  

Thanks for dropping by, enjoy your Sunday, n see you soon.

Jools. xxx

I'm entering this card into the following challenges :-


Crafters Companion Challenge Blog -  Four legged friends
Fab N Funky :- On all fours.
Digital Tuesday :- Birthday.
My Mum's Craft Shop :- Celebration.
Simon Says Stamp Challenge :- April showers bring spring flowers.
Cards For Men :- Spring colours
ABC DT Challenge blog :- Anything goes.
Pollycraft Monday Challenge :- Cute critters.


Saturday, 17 March 2012

Daughter's birthday cards, Clipart Fairy and My Craft Studio.

Morning everyone, where did our lovely spring weather go? If we can't have the sun we'll just have to carry on making bright sunny cards. Here's a few  cards I made for some girls at work, I think they're bright and sunny, how about you?


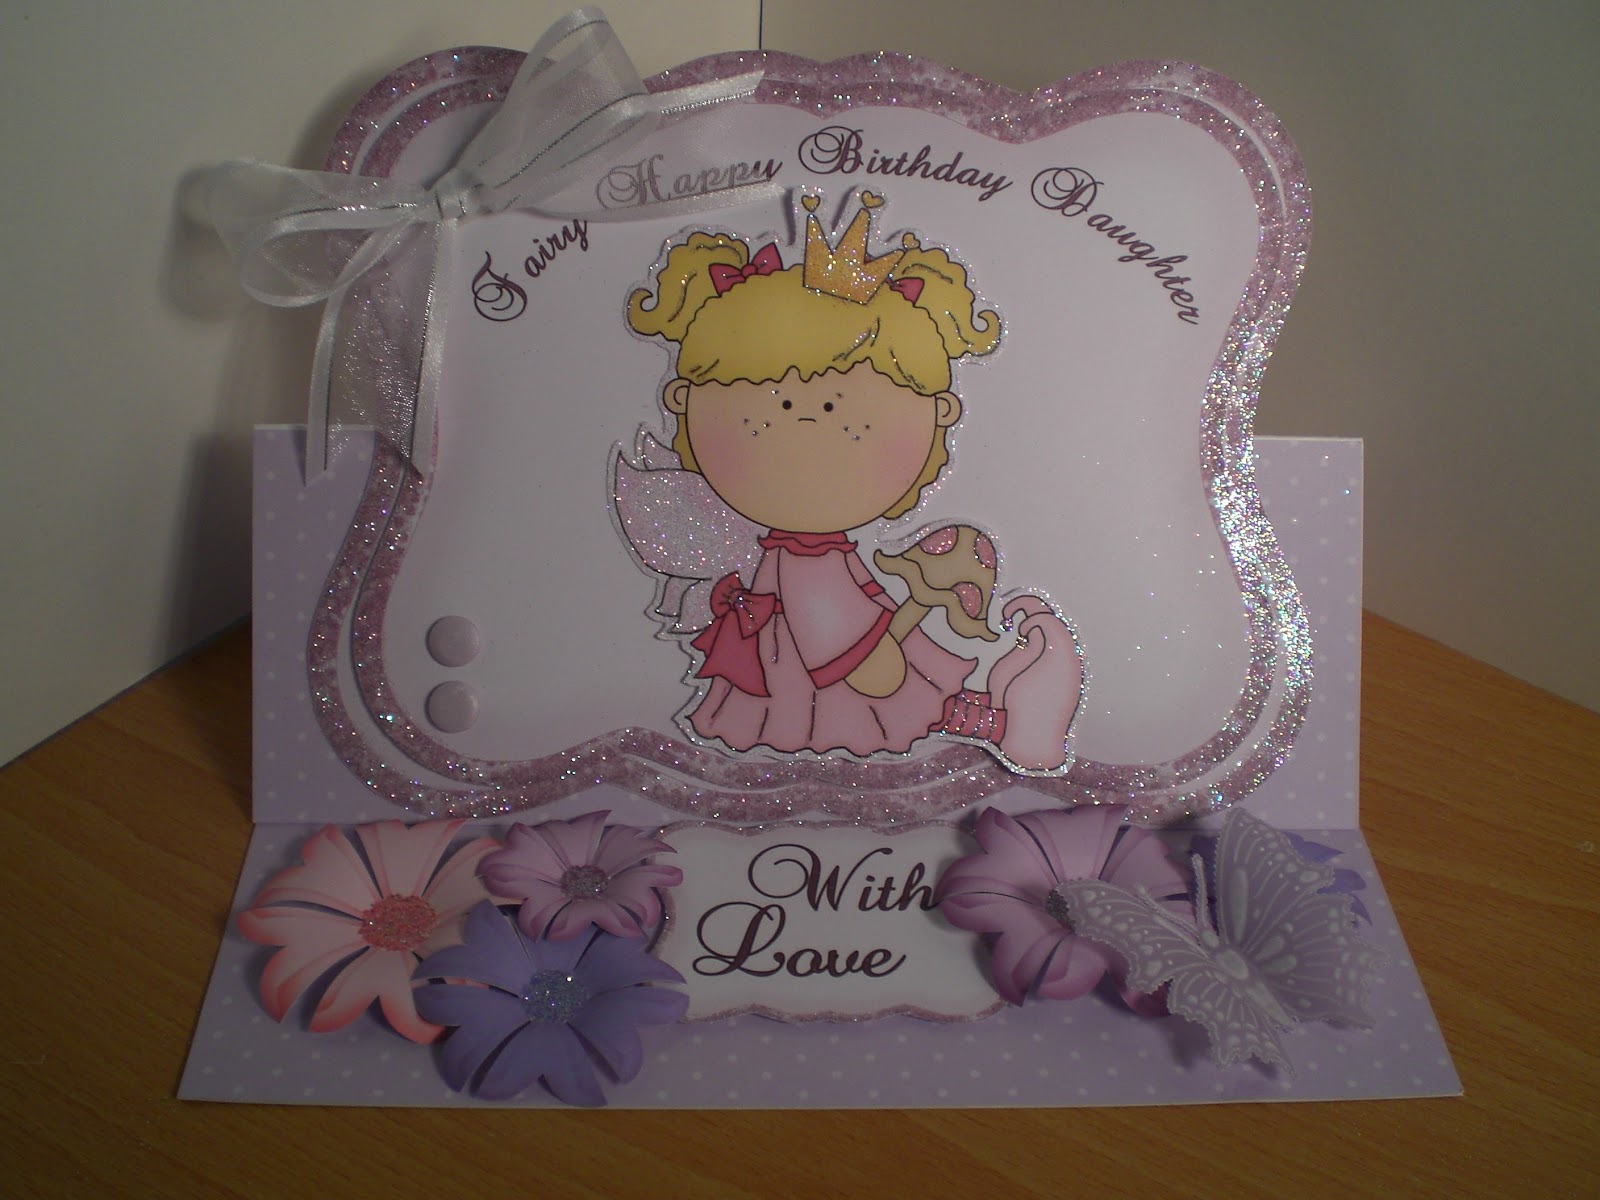
I love this first one, I was told fairies, girly, pink and lilac, flowers and butterflies, my favourite ingredients. I couldn't decide which, so she got the lot. The image is from Clipart fairy, she has some lovely designs on her website. When cutting out, I always leave a small border of white around the image , it's neater and if you glitter around the edges it appears to glow.

All the artwork is printed on 220gsm supersmooth card, that's as thick as my printer will take. That's ok for the image, but I found a single layer is'nt sturdy enough for the backing, so for this reason I usually mount the topper onto a double layer. The top layer has the main sentiment printed onto it using MCS, glitter all around the edges and use foam pads to layer the two. Finish off with a bow, some flowers printed from MCS countrside garden cd and a parchment butterfly using the pergamano butterfly grid. I think the criteria was met.


This next one was for a thirteen year old girl, who, according to her Mum was still a bit of a tomboy.


Again, a Clipart fairy image was used, this one is from the 'Pia' kit. I imported into MCS  to personalise it, by printing Chloe's name and age on the t-shirt. I didn't put a daughter sentiment on this card, I thought the name and age was enough.  The rest was pretty much as the card above.

Hope you liked them, thanks for popping by......

Jools. xx


Wednesday, 7 March 2012

Christening Invitations, christening easel cards and gift bag.

When my Nephew asked me to make the Christening invitations for his baby, I was a bit nervous. It's a big day and I wanted them to look professional. I knew they'd love whatever I made, but I wanted to make them special, whatsmore, this would be my first attempt.

My crafty pal Sue and me had been playing with hot foiling, so I thought that would be a place to start. I already had a nice selection, one of them being a lovely baby blue, a bit different from silver, perfect.


Once I got going they were quite easy, I didn't want them to be too prissie, Logan being a boy, so I thought a nice image of him in the background would look good. This photie is his Mum's favourite, so it was ideal. I faded it into the background using Craft Artist Professional. The good thing about CA is that you can turn layers on and off. So I printed the background image first on my inkjet printer.


 Next came the text. I had to print this on my laser printer to be able to hot foil it. Laser printers use toner instead of ink, and the toner melts during the foiling process, allowing the foil to stick. There are specialist hot foiling machines, but I use my laminator, it does a perfectly good job. This is where the layers function comes in. I needed the background image on the screen, to enable me to put the text in the right place, but before printing I turned the background layer off so only the text would print. Simples. Ha, you'd think! The paper goes face down in the inkjet printer and face up in the laser. Got that muddled a couple of times.

 I used spellbinders grand labels 1 for the matting and layering. The inserts were more straightforward, no background, so just the laser printing. Oh, and a bit of blue satin ribbon to finish, you have to have ribbon, even for a boy, don't you?


When it came to designing Logan's Christening card, I thought I'd stay with the same theme and use my toner foil, but silver this time. I did an easel card ( do you see a pattern developing ) shaped like a book. I wanted it to be something nice to keep and I thought a book shaped card would make it feel like the occasion had been recorded for posterity.


Finally, you can't have a posh card without a matching present, so I made a matching gift bag in MCS, their Encyclopaedia of card and papercraft templates had an ideal bag. I have an A3+ printer, so I just printed it bigger, using the same backing paper as the card and box.


A couple of weeks later I had an order placed for a combined Christening /1st birthday card,  with the emphasis being on the Christening. I decided to use the same format as for Logan's card, just adjusting and adding to the verse. Oh, and changing the colour, because this one was for a little girl.


What a difference it makes, just changing the colour to pink. My customer loved it, and so did Lois's Mum. That's always nice to know, isn't it?


That's it for now, lunch beckons, thanks for dropping by. TTFN.


Jools.  xxx


Monday, 5 March 2012

Mothers' Day Cards.

Good afternoon all. Well, it's that time of year again, 'Mothering Sunday'. It used to be quite simple, but now we have three generations of Mums in my family, so who does the cooking? :) Anyway, thought I'd share the cards I've made this year. There are three designs, one for me, one for my Sis and one for my friend. Two are very pretty and girly and one is more traditional, hope you like them.


This first one is a standard easel card, which I designed in Craft Artist Professional. I used backing papers from the 'Country chic flower' collection by The clipart Fairy. I love her style and use a lot of her papers in my designs.


I made the frame using the punch feature in CA, adding effects to give a cushioned, 3D look, before mounting it with foam tape onto the background. It's a bit fiddly, there are six layers to the frame, all with individual effects, but I'm getting better and it looks really great. A flat photogragh doesn't really do it justice. The daisy and hearts were from the kit, with the the compulsory sprinkling of glitter.. I'm going to have a go at designing my own flowers soon, now that I'm getting the hang of the graghics program. I'll show you my efforts later.


The second card was again a traditional easel ( does it show that I like 'em? ). This one is for my friends Mum. I was told anything with Westies or gardening. I went for westies, because I knew I had exactly the right image on one of my CD's. It definately has the ' ahhh ' cute factor, don't you think?


The image is taken from an original painting by an Italian  artist called  'Giordano'. Joanna Sheen has produced a couple of CD's using his work. This one is from the 'Puppies & Kittens' cd. Take a look, you won't be dissappointed. I curved the text in MCS and used my spellbinders Grand scalloped circles to cut out the design and mat and layer. Again, my license to glitter was used, also a touch of Tim Holtz spun sugar distress ink, to take off the stark whiteness of the card. It's ok using supersmooth, bright white paper for printing, but it is what it says on the box, bright white. Don't know what I'd do without distressing ink, dazzling a load of folk, I suppose. Does anyone recognise the flowers?   


My third card is completely different. My sister ordered this one and chose what she wanted to go on the card. It's about time I started doing something with all my parchment toppers I suppose.


I think this card was the most complicated out of all of the cards. I'ts a big card, 8x8, so a lot of space to fill. I found a great piece of papermania backing paper, which had Mothers' Day plastered all over it, and it was the right colour too, our Mum loves blue. I have loads of pads with backing papers in, but since I've started cd crafting, I rarely look at them. I must make an effort.

The whitework topper was made using the Pergamano multi grid, no14.  I really enjoyed doing these toppers, as with the butterflies, you can do them while relaxing at night watching tv. Very therapeutic. But I must remind myself to do something with them!  The tulip topper was mounted onto the largest of the spellbinder lacey circles, S4-293. Just the right size. Bit of denim blue distressing and a trail of gems for the butterfly and the card was born. Ahhh....

Well that's all for now, I think I'll go and play at designing some flowers. Or I could have a go at using my guilding flakes that arrived a couple of days ago. I really must stop spending. 


Bye................


Jools.

xxxxx